Mystery Book Clubs Online Resources

Mystery Book Clubs

As I was preparing for my Mystery Book Clubs Unit of Study, I was searching for resources that I could use in my classroom. There is so much available, most of it free, but great things! So I thought if I could put together a post about links of useful resources of this topic it would be so helpful. So here it is.

Mystery Book Clubs Printalbles

Scholastic-Exploring the Mystery Genre at Scholastic

Scholastic- Investigating the Mystery Genre

What is a Mystery?

Character Traits


Mystery Book Club- Pinterest

https://www.pinterest.com/corrynm/teaching-mysteries/


Mystery Book Clubs

Mystery Book Clubsgenbadge

One of the Units of Study in the third grade Readers’ Workshop is Mystery Book Clubs. Of course, I added a few “extras” to the the unit. I just can’t contain myself! I really like to gets the children motivated and excited about what we do in the classroom. I know with the information included in the units of study they will have great instruction and will deepen their knowledge about the mystery genre. I also want to get the children involved in their learning.suspect1

I know the children watch many television mystery shows. Some of the ones they watch, I don’t usually watch because they are scary. But, they at least are familiar with the genre. I found this Crime Scene tape that I used the day I introduced the unit. I taped it across the top of my door, so everyone could still walk in. I then staged a crime scene. I knocked over desks, put eaten food wrappers on the floor, hid a significant object, etc. I then gave the children time to observe what they see. They will then need to infer how many people were involved in the crime, what the crime was, and who they think committed the crime. I had them do a written response in their reading notebooks where they needed to show the evidence and proof of the crime. They needed to show their thinking of the crime.

download (15)

I also made a Top Secret folder for the children to keep all of the handouts for our mystery unit. I found quite a few printables from Scholastic that were easy to download and were free!! I just printed the Top Secret page and had the children glue it to the front of the folder. I included a page on Mystery Vocabulary, fingerprints, graphic organizer for mysteries, mystery reading log, and  a bookmark. As I presented the unit of study to the children we would refer back to these pages.

Fingerprints

One of the most popular activities was to fingerprint themselves. Without going to the Crime Scene Investigative Store and spending lots of money, there is an easier way to show fingerprints that is way less expensive. All you need is paper, pencils, and transparent tape.

1. Have the children scribble on a small area on paper with their pencils. They will then rub the pad of the finger tip on this area. The finger will become quite black.

2. Take a piece of transparent tape and place the blackened finger tip on the sticky side. Stick the tape onto the fingerprint page for each finger. They will then have an image of their fingerprint to see. This kind of mirrors how they find fingerprints at crime scenes.

3. Compare their fingerprints with the finger print analysis page to see what kind of patterns they have. FingerprintRidgePatternsAndCharacteristics mystery book clubs


Mystery Book Club Series

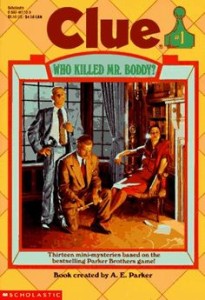
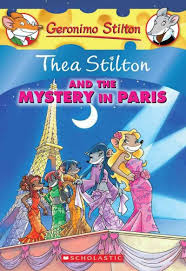
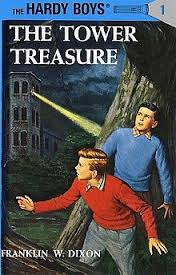
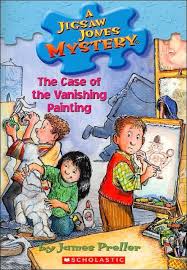
There are many mystery genre series that the children can read and participate in book clubs, or literature circles. Some of the series are:

cam jansen e86fafd22de1d51040d1425441ecacad enclyclopedia brown geronomo stilton hardy boys images (18) jigsaw jones nancy drew nate the great box car children


There are more, which is such a great thing. When I was little, all I knew were The Hardy Boys and Nancy Drew! We have come a long way, baby!

In my district, we use Lexile Levels for the children to choose books. If you can get several copies of the same title, that would be great. If not, get several books in the same series for the mystery book clubs. There are a whole lot of ways to run the book clubs, so you can do some research on the way that works for you.

Videos- Mystery

YouTube has some old mystery shows that you can watch with the children so those children that have never seen a mystery can see one. We actually watched a Hardy Boys episode from the old TV show with Sean Cassidy. It was great! I had them use their “Detective Notebook” and they wrote down clues they found as they were revealed. I stopped it in the middle to have them make a prediction of who they think the suspect is. At the end we talked about the clues they found, evidence in the show, and how they came to the conclusion of their suspect.

Scratch Off Drawings

Scratch Off Drawings

In college, I had to take an art class in which I was given a list of art activities that could be made by children in my class. I had to make them in my dorm room, so I can testify that they are easy enough. One of my favorites is the scratch off drawing. Since I made the one in my dorm room, the World Wide Web has allowed me to find different versions. I will try to post as many versions as I can.

Version 1- Scratch Off Drawings- Etchings

The most simple version is just using crayons. On either white or manila construction paper, have the children color the whole paper. I make smaller squares because the children don’t usually have that much stamina to do a whole sheet. They need to color dark.

download (14)

After they complete that stage, they need to color over the whole sheet with black crayon. It needs to be even darker than the colors underneath.

Once the sheet has been colored over with black crayon, the children can begin scratching off the black crayon in any design they want. I suggest they use the tip of their scissors opened. It should be a sharp tool. Have them experiment with different tools- nails, finger nail files, popsicle sticks, pencils, pens, etc.

scratch off drawing- crayon

Scratch Off Drawing Using Crayons

diy-crayon-place-cards-for-parties

Version 2- Crayons and Paint

This version only changes after the colored crayons have been completed.

Instead of using black crayons black tempera paint is used as the over coat. This is a little messier than the crayons. Make sure the children cover their clothes because I am not sure if the paint will come out in the wash.

Just paint over the crayons and allow to dry before scratching off.

DSC_0186-300x224 scratch off drawings paint

Scratch Off Paint using Tempera Paint

Version 3- Crayons and Paint Mixture

Instead of using tempera paint, acrylic paint is used along with dish detergent.

Equal amounts of acrylic paint and dish detergent mixed in shallow bowls is painted over the colored crayon drawings. This mixture is similar to the scratch off lottery tickets. You can use any color, even silver or gold.

7199439_f520 scratch off drawings acrylic

Scratch Off Drawings Using Acrylic Paint

Version 4- Pre-Made Scratch Off Paper

You can also purchase sheets of scratch off paper. All of the mess is done for you. Just scratch off and it’s ready to go.

The colors underneath are usually brighter. These papers can be found in arts and crafts stores.

images (17)

Have fun!


Lanyard Bookmarks

Lanyard Bookmarks

There are several times in a school year that allows children to create something for ones they love. The winter season holidays, Mother’s Day, Father’s Day, and others. I know there just isn’t much time to spend on non-curricular activities. So, it is imperative that the time we spend on crafts in the classroom is minimal, the crafts are easy enough to complete quickly, or can possibly be taken home to finish. Also, the cost is not prohibitive. I know I still need to pay my mortgage each month.

These bookmarks are very easy, and have used them while I was teaching first, second, and third grades. It doesn’t matter how careful the children are making sure the lanyard lays flat. Parents usually are not bothered by the details. They love the projects because they are made by their child, and it is a useful gift.

Materials Needed for Lanyard Bookmarks

  • Plastic Canvas (This is the plastic canvas many crafters use for needle point boxes, projects, ornaments, etc.) 3-Colors-1-Lot-3Pcs-7CT-7-Count-Plastic-Canvas-Grid-90-70 for lanyard bookmarksThe canvas comes in many different colors, but I have found that clear works the best. You can see the colors of the lanyard. It comes in many sizes, so pick the size that will work for you. I usually use the largest, because it is cheaper. I will then cut it to the size I want.
  • Plastic lanyard, also called gimp (comes in many colors)

images (15)lanyard bookmarksScreen-shot-2011-01-14-at-1.25.04-PMimages (16)


The plastic canvas and plastic lanyard can both be found in any arts and crafts stores.

How to Make the Lanyard Bookmarks

  1. Cut the plastic canvas to the size you want. I make them, please excuse my non-exactness, but, 12 squares across. 12 is easily divided by however many colors the children choose. Yes, I allow the children to choose their colors! The length is whatever you want. Make sure when you cut the canvas you cut closely to the edges so there are not any jaggedy edges.
  2. Cut the lanyard longer than the canvas. I like to have fringes on both sides of the lanyard bookmarks. The children may want to make a pattern with the colors. I usually allow them to have up to 4 colors.
  3. To begin the weave, string one lanyard strip down the first hole on the edge of the canvas. I hold this with my thumb to make sure it is not pulled through. You could possibly tie the end, but it is difficult for it to stay tied. Trying to keep the lanyard flat, bring the end up through the next hole of the canvas.
  4. Continue going up and down all the way to the end.
  5. The next lanyard string, go up from the back of the first hole of the canvas. Alternating the beginning allows for a different pattern. It does not have to be alternated. The pattern can also be made by alternating the colors of the lanyard strings.
  6. One thing you want to make sure is to try to keep the lanyard flat. It tends to twist as it is pulled through the holes. If you get a twist, the only way to flatten it is to take it back out of the hole, and gently pull the lanyard, guiding it through slowly, making sure it stays flat. Some may want to make a pattern with twists.
  7. Once all of the lanyards are woven in the canvas, there are fringes at both ends. You could put beads on the ends, but I usually don’t. It is a bookmark that needs to be flat. I usually just cut off the excess at however long I want it. The children can do the same.download (9)

These lanyard bookmarks make great gifts. I love that the children are developing small motor skills as they craft. I am not sure how many parents receive these as gifts. I assume the kids keep them! They love doing them.

Some tips

  • I give the children plastic sandwich bags to keep the lanyards contained. It is so easy to loose them.
  • Tell the children to only use one lanyard at a time and keep the rest in the bag.
  • Allow the children to take home whatever they don’t finish in class.
  • You may want to have the children wrap the lanyard bookmarks. They could use construction paper in which they decorate. Tissue paper is good, too.
  • Use straightened out paper clips to help them unweave the lanyard if there are twists.

Good luck and have fun!

Share any successes or other easy craft projects.

jbfsaleblog Although I have been making the lanyard bookmarks for about 20 years, this link is to another blog that I used the picture above.

Student Organizational Binders

Student Organizational Binders

For years now I have used student organizational binders for the students. These binders have everything in them that a student, parent, or teacher would need. Once the students know what they are, and how they are used, they embrace them, as well as the parents. I found them while searching on the Internet. I researched them to find the perfect name for the binder that follows my classroom theme. It has been awhile since I have searched for them, so I will try to give you some links to help you out. These student organizational binder have been a life saver on many occasions.

transform mess to organization

For my second graders, the first binder was called a BEE Book. Each of the letters in the word Bee stand for: Bring Everything Everyday. Of course everything was decorated with bees. I didn’t exactly have a classroom theme at the time, however, I did have these behavior posters with bees that I used: Be polite, be responsible, etc. It worked.

What is so special about a binder?

Well, as I said before, everything a student, parent, or teacher could want. It starts with a personalization of the binder. I used the clear view binders where you can place a cover in the pocket, usually the 1″ size. Depending on what you are putting into the student organizational binder depends on the size of the binder. 396291_p_052815I would make a poster/cover for each child. Here is an example of the one I used. amanda beecover good

Untitled

Contract

The next addition to the BEE Binder is a contract. Mrs.McDowell’s Bee Book Here is a link to a website that I probably used as I was researching. She has some great downloads of what she included.

The contract is included to make the children more aware of how important these binders become to the classroom happenings. The contract in the student organizational binder spells out what and how to take care of the binder. I know a lot of time goes into the making of these binders. I don’t care about the time because I know how valuable they are in the workings of our day. Students sign the contract so they know what will be expected of them.

Inserts in Student Organizational Binders

Now for the good stuff, as if the previous stuff isn’t awesome. As I list some of these inserts you may be getting the brain explosion of what you can do to make your own binder. Remember, these student organizational binders purpose if for organization. I try and cover all bases and include probably way too much. It’s OK.

1. Contact Information- Make sure you include your email and the school phone number.

2. Specials- I list the special of each day so the students can be prepared for each one.

3. Spelling Activities- I usually have a list of activities the children can choose for homework.

4. Math Helpers- I usually include a hundred chart, tens frame, addition chart, etc. These will always be available for homework reference.

5. Handwriting Poster- This I include so the children will always have a reference to how to make the letters properly.

6. Behavior Policy Expectations- I need to have the parents aware of my expectations so we can all be aware of what is expected. I usually have students, parents, and myself sign.

7. Planner- Our PTN supplies each class with a planner. I include this so homework can be posted each night. It also serves as a communication between school and home. Reminders, activities, etc., are recorded in the planner. You can download homework forms if you don’t have access to the planner.

8. Pouch- I use the pencil pouches that you can get at the back to school sales during the summer for under a dollar. The pouch can house any lunch money, notes, pencils, etc., that usually gets lost in a bookbag. If it is accessible in the student organizational binder, the students know exactly where it is when needed.

9. Lunch Menu- No more questions on what the cafeteria is serving that day.

10. Homework Pouch- I found these pocket folders with velcro closers that will house any thing the students will need for homework. Math worksheets, spelling notebook, reading log, homework tracking sheet.

Each of these inserts are placed in a clear sheet protector for durability. These binders are expected to last the whole year.

student organizational binders

Labels

I also printed out labels so there is no confusion about where things go.

  1. Inside the binder cover, I make sure I have a folder pocket. I put a label entitled, ” Important Papers” for any announcements that come from school.
  2. I also put a label on the back folder pocket entitled, “Bee-u-ti-ful Work- Keep Home.” This is for all the corrected work that usually gets shoved in desks.
  3. I put a label on the pouch entitled, “Money, Notes, Etc.”
  4. I also label the “Homework” Pouch.


Using the Student Organizational Binder

As we go through our day, the BEE binder becomes “The Place to BEE.” When the students enter the classroom in the morning, all homework needs to be placed on their desks. All they need to do is open their BEE books. I also sign, or check off, all homework completed in the planners.

As we go through our subjects in a day, and as homework is assigned, they go right into the BEE binder. There should be no more papers shoved in desks.

At lunch time, if students have money for lunch, go right to the BEE binder to get it. Book Fairs, Plant Sales, Supply Cart, etc., look for what they need in the BEE binder.

At the end of the day, the students write their homework in their planners, I then sign them to make sure they have it written down. There should be no questions about homework. Parents expect to see the planner each night, they sign when homework is completed. All homework is then place back in the BEE binder. No excuses.

I rely on the binders. They allow you to be a proactive planner, in that, all of your organization is done by using the binders. If there was a way to organize my moment by moment actions: misplacing homework sheets to hand out, spelling word list, etc. I’m working on it.

Here is a link to a site that has a ton of student organizational binder names. I used BEE Binders because it worked for me. Now that I am in 3rd grade, my classroom theme is My Rockin’ 3rd Grade, so I use a STAR Book- Students Taking Awesome Responsibility. Moose books, frog books, etc., are listed. Enjoy Acronyms for Student Organizational Binders

I hope you have fun creating and collecting for your student organizational binders.

Please share how yours comes out.

Fractured Fairy Tales

Fractured Fairy Tales

Our last Unit of Study is Once Upon a Time, where the children write their own fractured fairy tales. It is a great unit at the end of the year. Before we start the unit, I immerse the children in fairy tales. We talk about what fairy tales are, how they came about, and what makes a fairy tale a fairy tale. I made a folder with several handouts for them to use throughout the unit. There are some great resources out there- FREE!anchorchartfairy tale story elements

The first day I read two different versions of Cinderella, both from different countries. We then used a venn diagram to compare the similarities and differences of the two stories. I also printed a world map so as we read Cinderella stories from around the world we marked where the story took place from: http://firstgradewow.blogspot.com/2013/10/cinderella.html. There is whole pdf unit about Cinderella in which the map is included. Each day after that I read a different Cinderella story and as their readers’ response, they compared the stories in their notebooks.

Fractured Fairy Tales: Cinderella

After a few days of Cinderella, I found a fractured fairy tale of Cinderella online at: http://the-office.com/bedtime-story/cinderel.htm. I read it to them while they followed along. We began talking about the elements of fairy tales and fiction and that fractured fairy tales area fairy tale that has been changed in some way. Either the gender of the main character, the setting, the conflict, the solution, something is changed. The comparisons of the Cinderella helped the children see how the story could change by geography.

We also had a discussion about how to change the point of view the story is told. A great example of that is “The True Story of the Three Little Pigs.”download (7)This story is told from the point of view of the wolf. I found a great graphic organizer to help the children understand more about the point of view from:  http://love2learn2day.blogspot.com/2014/01/fractured-fairy-tales-character.html. Here is a photo of it. fairy tale point of view graphic organizer


So after a week the students were then ready to write their fractured fairy tales. I had them make a plan for their story, pretty much a story map, listing the characters, setting, conflict, etc. I had many fairy tale books that the children could refer to as they chose their fairy tale and then fractured it. They were so excited about the prospect of writing their own story!

I also was able to find a fractured fairy tale readers’ theater. It’s called, “Fairy Tale News” from Scholastic. download (8)The story of the play is a news station with roving reporters interviewing fairy tale characters. It is really cute and the children giggle at all the funny parts. We are going to be performing it for their parents this week at our end of year party. They are so excited!!!! We planned what they could wear, using microphones, blocked out where they will speak. I even made a power point with backgrounds for each of the interviews.

There are so many things you could do with fairy tales. As Einstein said, “If you want your children to be intelligent, read them fairy tales. If you want them to be more intelligent, read them more fairy tales.”

Customizing Mini Books in Lapbooks

Lapbooks are a great way for teachers to assess their students’ learning. Of course, you, as a teacher, need to assess the students according to your curriculum. So, hence, customizing mini books.

Customizing Mini Books

As we speak, I am teaching a unit in science on forces and motion. As I looked at all the objectives in my science curriculum, I now had the awesome task of putting content from the text book into mini books. I find this part of lapbooking the most exciting. There are so many different kinds of mini books, and matching objectives and design to mini books lets my creativity explode. Usually as I lament about the good ole’ days of teaching, “I used to be very creative in the classroom, when we could do art projects, unit projects, etc. We can’t do that anymore.” Any one with me here? Well, lapbooking is a way to creatively bring your creativity back in the classroom.

So, one of the objectives in my unit is list ways of motion. I counted and there are six different motions. I need to find a mini book that will have six ways to list ways of motion. I found a six petal book that would allow me to customize my mini book. After we read from the text book, I had the children record the six ways of motion, one on each petal. I also had them show, using arrows, how the motion is performed. They were the able to personalize their mini book by decorating and coloring. We then folded the petals in, glued them onto the lapbook.

customizing mini book 6 petal book

Customizing mini books allows you to follow a line of thinking as you prepare them. Another mini book I made for this unit was the vocabulary mini book. As I searched for mini books, I saw a puzzle template. That intrigued me, to make a puzzle piece vocabulary book. I looked through all of my jigsaw templates and found one that had just two pieces of jigsaw puzzles interlocked. I thought if I could put the vocabulary word on the one piece, the children would be able to record the definition on the other piece. customizing mini books puzzle pieces


Customizing Mini Books in MS Word


I use Microsoft Word to do my customizing mini books. I will tell you how with this program. You may have experience in another program, which is great. It is much easier and to save some time, format each piece before copying. Once I insert the template into a document I need to delete one of the pieces.  So, I double clicked on the picture, and this brings up the tool menu for photos. I clicked on the crop tool. I click and drag to crop off the third piece.670px-Put-Photos-in-a-Microsoft-Word-Document-Step-6Bullet2


I now can add a text box for the vocabulary words. Click on insert, text box, and choose draw a text box. You will then need to put your mouse over the puzzle piece and click and drag to make a box. Once you let go of the mouse button, you will see a rectangular box. Click inside to get the cursor. Choose your font, size, and I usually bold the words. I don’t usually like to see the box around the words, so I format the text box by going to the text box format tool. Click on the text box, and click on the no outline choice. You will then see a blue box which you can see now, but it won’t be there when you click off of it. Click on the paint can and click on no color. This will make the text box clear. You can type the word now, or wait until you copy the puzzle piece.

download (6)

Now I can now copy as many images as I will need. For my project, I needed 6 copies for 6 vocabulary words. Place the mouse over the image and right click the mouse. Move the arrow to copy, and click. Place the mouse on the document anywhere except on the image, right click and move the arrow down to paste. You will then see two images. Repeat this step until you have enough puzzle pieces.

Now you need to do the same for the text box. It has already been formatted so it will copy all of the formatting, which saves lots of time. Place your mouse over the blue lined text box until your mouse turns into a four arrow. Then right click on the blue line, move the arrow down to copy. Then move your mouse over one of the puzzle pieces, right click and move the arrow down to paste. Repeat this step 6 times. You will need to click and move each text box into the puzzle piece.

Now you can click in each text box. It will be invisible, but once you click where you put the box, the cursor will appear. Type each word in a text box.

Customizing mini books is not all that difficult, if you know what to do. I hope I have been able to help you with the beginning steps. If you have any problems, you can comment at the bottom.

I would love to hear from other people and what programs you use in customizing mini books.

IMG_20140715_143903319I

I have prepared a tutorial on customizing mini books in microsoft word. Just click on the link.