
Customizing Mini Books in Lapbooks
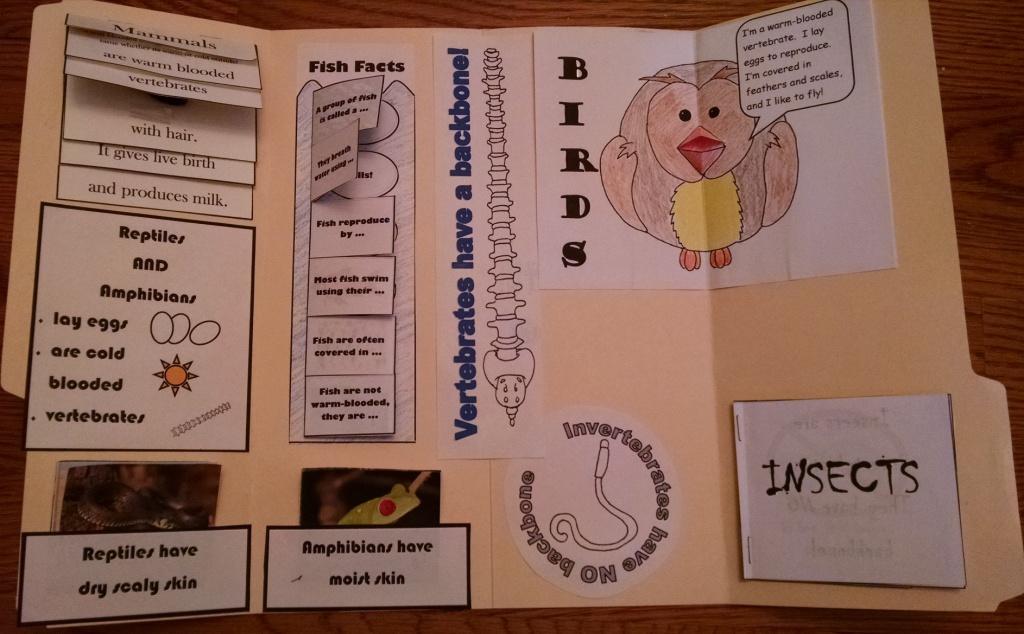
Lapbooks are a great way for teachers to assess their students’ learning. Of course, you, as a teacher, need to assess the students according to your curriculum. So, hence, customizing mini books.
Customizing Mini Books
As we speak, I am teaching a unit in science on forces and motion. As I looked at all the objectives in my science curriculum, I now had the awesome task of putting content from the text book into mini books. I find this part of lapbooking the most exciting. There are so many different kinds of mini books, and matching objectives and design to mini books lets my creativity explode. Usually as I lament about the good ole’ days of teaching, “I used to be very creative in the classroom, when we could do art projects, unit projects, etc. We can’t do that anymore.” Any one with me here? Well, lapbooking is a way to creatively bring your creativity back in the classroom.
So, one of the objectives in my unit is list ways of motion. I counted and there are six different motions. I need to find a mini book that will have six ways to list ways of motion. I found a six petal book that would allow me to customize my mini book. After we read from the text book, I had the children record the six ways of motion, one on each petal. I also had them show, using arrows, how the motion is performed. They were the able to personalize their mini book by decorating and coloring. We then folded the petals in, glued them onto the lapbook.

Customizing mini books allows you to follow a line of thinking as you prepare them. Another mini book I made for this unit was the vocabulary mini book. As I searched for mini books, I saw a puzzle template. That intrigued me, to make a puzzle piece vocabulary book. I looked through all of my jigsaw templates and found one that had just two pieces of jigsaw puzzles interlocked. I thought if I could put the vocabulary word on the one piece, the children would be able to record the definition on the other piece. 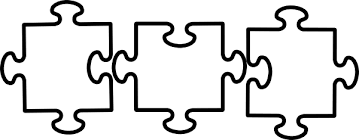
Customizing Mini Books in MS Word
I use Microsoft Word to do my customizing mini books. I will tell you how with this program. You may have experience in another program, which is great. It is much easier and to save some time, format each piece before copying. Once I insert the template into a document I need to delete one of the pieces. So, I double clicked on the picture, and this brings up the tool menu for photos. I clicked on the crop tool. I click and drag to crop off the third piece.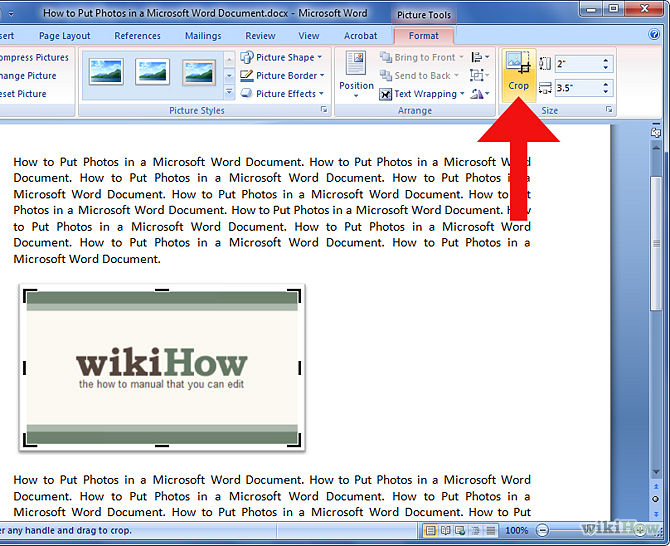
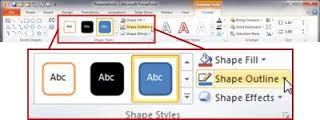
I now can add a text box for the vocabulary words. Click on insert, text box, and choose draw a text box. You will then need to put your mouse over the puzzle piece and click and drag to make a box. Once you let go of the mouse button, you will see a rectangular box. Click inside to get the cursor. Choose your font, size, and I usually bold the words. I don’t usually like to see the box around the words, so I format the text box by going to the text box format tool. Click on the text box, and click on the no outline choice. You will then see a blue box which you can see now, but it won’t be there when you click off of it. Click on the paint can and click on no color. This will make the text box clear. You can type the word now, or wait until you copy the puzzle piece.
Now I can now copy as many images as I will need. For my project, I needed 6 copies for 6 vocabulary words. Place the mouse over the image and right click the mouse. Move the arrow to copy, and click. Place the mouse on the document anywhere except on the image, right click and move the arrow down to paste. You will then see two images. Repeat this step until you have enough puzzle pieces.
Now you need to do the same for the text box. It has already been formatted so it will copy all of the formatting, which saves lots of time. Place your mouse over the blue lined text box until your mouse turns into a four arrow. Then right click on the blue line, move the arrow down to copy. Then move your mouse over one of the puzzle pieces, right click and move the arrow down to paste. Repeat this step 6 times. You will need to click and move each text box into the puzzle piece.
Now you can click in each text box. It will be invisible, but once you click where you put the box, the cursor will appear. Type each word in a text box.
Customizing mini books is not all that difficult, if you know what to do. I hope I have been able to help you with the beginning steps. If you have any problems, you can comment at the bottom.
I would love to hear from other people and what programs you use in customizing mini books.
 I
I
I have prepared a tutorial on customizing mini books in microsoft word. Just click on the link.